
REVIEW: Instant Pot Duo Crisp with Ultimate Lid
The Instant Pot Duo Crisp with Ultimate Lid features an attached lid that can both pressure cook and air fry, this one-of-a-kind Instant Pot has a lot to offer. Read our full review to find out if it’s right for your kitchen!
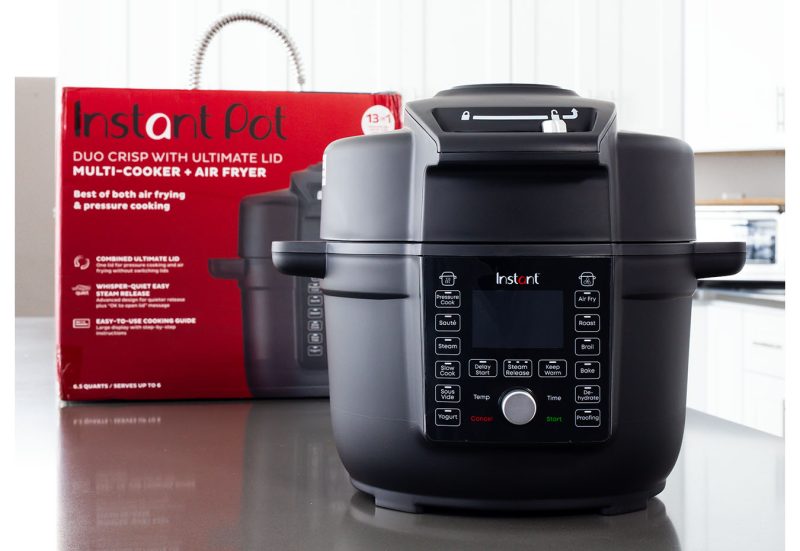
The newest Instant Pot is the Duo Crisp with Ultimate Lid, the first ever-model to offer an attached, multi-function lid and an awesome dot matrix display that talks to you with words!
We’ve been cooking in it for a couple weeks, and we’ll tell you everything you need to know about this brand-new combination pressure cooker and air fryer.
❓ Looking for our review of the regular Duo Crisp with the two separate lids? Click here!
Since this is a really long, thorough review, click the links below to jump to the sections you’re interested in:
- What is the Instant Pot Duo Crisp with Ultimate Lid?
- Quick Pros and Cons
- Detailed Feature Breakdown
- How to cook with the Duo Crisp with Ultimate Lid
- User Manual information
- Specs for the Instant Pot Duo Crisp with Ultimate Lid
- What comes with the Instant Pot Duo Crisp with Ultimate Lid?
- Why did I get the Burn Notice on the Ultimate Lid Duo Crisp?
- Warranty Information
If you prefer learning by watching videos, check out our How to use the Instant Pot Duo Crisp with Ultimate Lid video on YouTube.
Bottom Line: Ultimately, I think the Duo Crisp with Ultimate Lid is an air fryer first and a pressure cooker second. If you don’t plan to pot-in-pot cook often and don’t want to air fry large batches, this could be a really good option for your kitchen.
WHAT IS THE DUO CRISP WITH ULTIMATE LID?
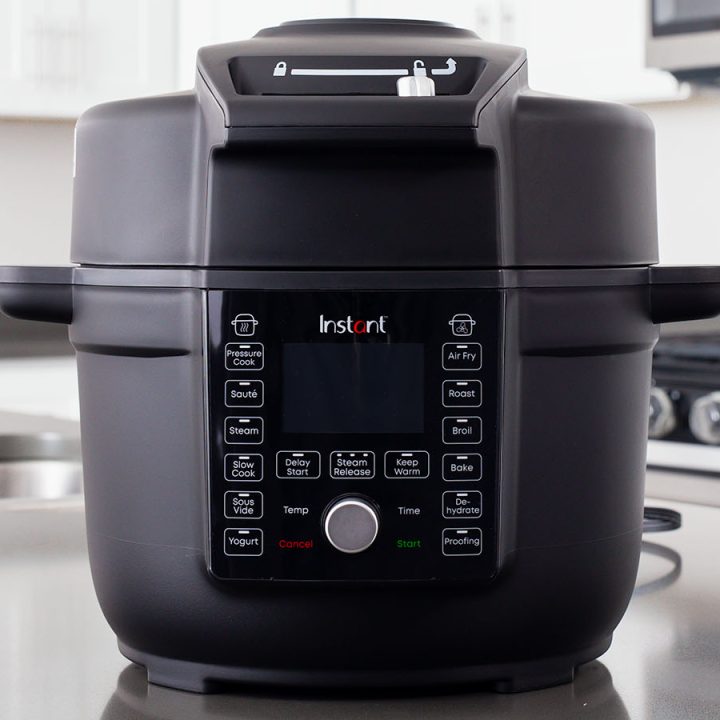
The Instant Pot Duo Crisp with Ultimate Lid is the latest model of electric pressure cooker made by Instant Pot. As of this writing, it is currently a Target exclusive product It only comes in a 6.5-quart size.
This is the only one of the Crisp models (Duo Crisp and Pro Crisp) that has an attached lid. This lid has a special pressure cooking cover as well as an air fryer heating element with fan. This lid is unlike any Instant Pot we’ve seen before.
Comparisons to Other Combination Air Fryer / Pressure Cooker Models
This Ultimate Lid model seems to be Instant Pot’s answer to the all-in-one Ninja Foodi with Smart Lid).
Like that model, the Ultimate Lid Duo Crisp is able to pressure cook and air fry using the same, non-removable lid. It also features a 6.5 quart pot, like the Foodi Smart Lid, which comes with a 6.5 and 8-quart size. The Ninja Foodi lid hinges open on the left side while the Ultimate Lid hinges open at the back.
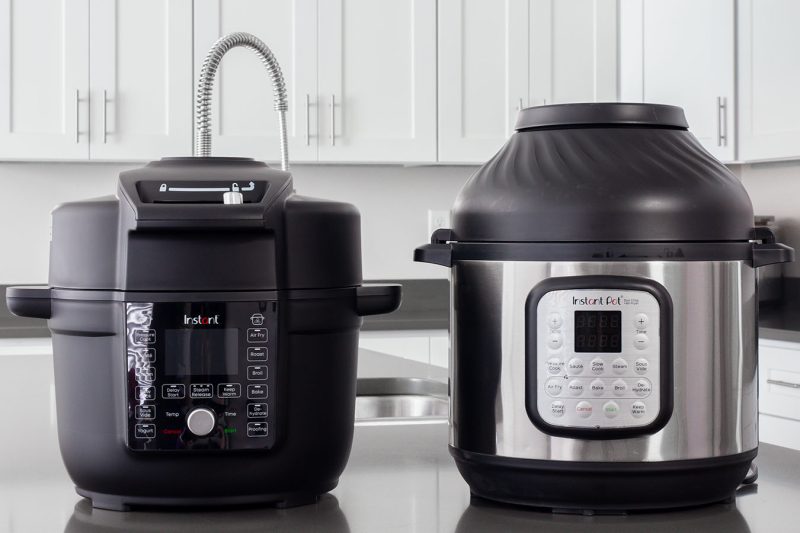
As for how the Ultimate Lid compares to the older model of the Duo Crisp, the main difference is that the older models came with two removable lids, one for pressure cooking and another for air frying. In contrast, you cannot remove the lid from the Ultimate Lid model. In addition, the newer cooking pot is wider and shorter than the older models, which limits the amount you can air fry at one time. It also limits the accessories you can use with it.
QUICK PROS AND CONS
The Instant Pot Duo Crisp with Ultimate Lid incorporates some of my favorite features from other Instant Pot models, along with some brand-new features that I hope stick around.
Here are my main pros and cons, listed briefly, then I’ll expand on these features in the sections below:
🟢 Pros
- The lid is really well-thought-out. The button and switches are intuitive, the pressure cooking cover makes for easier clean-up, and the cover releases and inserts easily.
- Easy-to-read button layout with pressure cooking buttons on the left and air fry functions on the right, as well as the knob/button combination for making selections.
- The dot matrix display makes it much easier to know what’s going on inside your pot.
- Includes all of the basic cooking functions without the presets. (In our experience, the presets make the unit more intimidating without providing much value to the users.)
- Integrated condensation cup is wider and easier to clean.
🔴 Cons
- Since the silicone sealing ring is screwed into the pressure cooking cover, there’s no way to use separate rings for savory and sweet foods.
- The single lid makes the whole unit heavier to lift (18 pounds). This is our main issue with the Ninja Foodi models, though their models range between 21 and 26 pounds.
- The lid does not remove, which means it tilts at a 90-degree angle when you’re adding ingredients or sautéing, so you need a good amount of space above and around it.
- The single Air Frying / Cooking Rack accessory isn’t as useful as a the separate trivet and air frying basket that comes with the two-lid Duo Crisp model.
- The shorter pot means that some accessories won’t fit, which makes pot-in-pot cooking more difficult.
Return to the Table of Contents
Detailed Feature Breakdown
In order to create a single-lid version of their Crisp series, Instant Pot had to make a number of major design changes to the appliance.
Redesigned, Single Lid
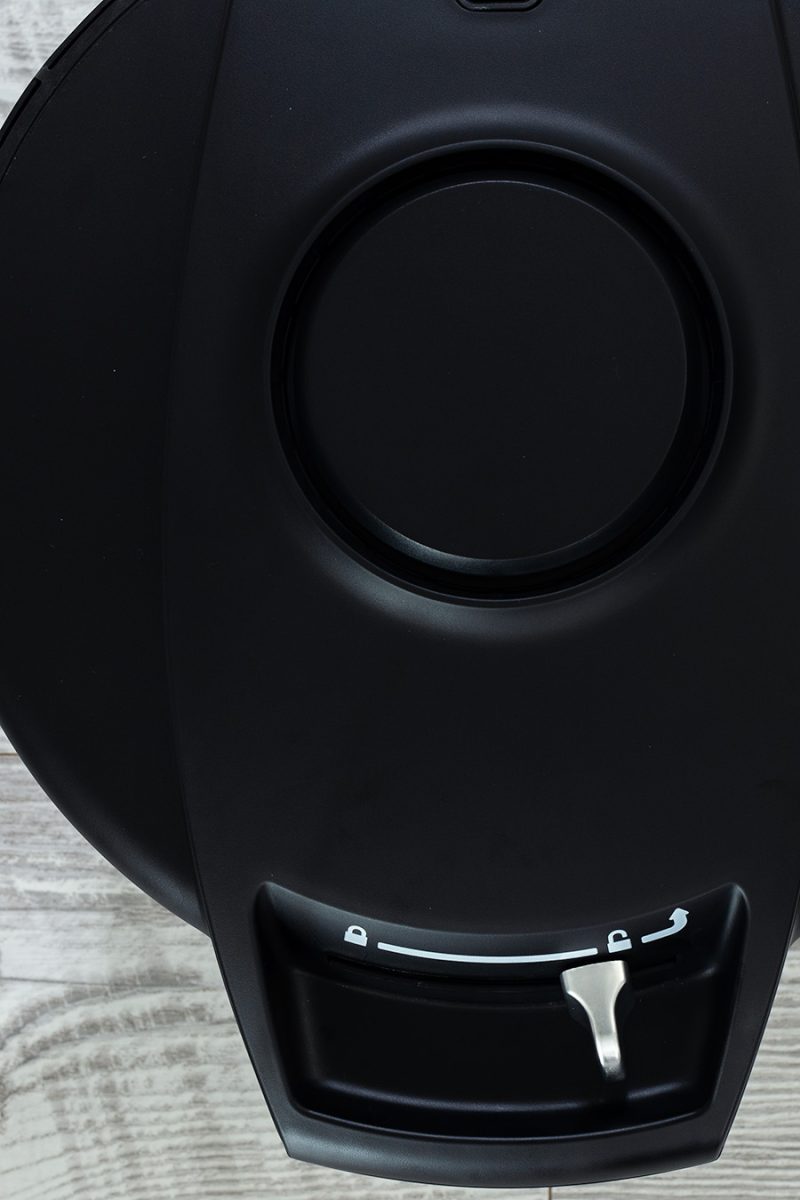
The biggest, most-obvious design change is in the lid. On the outside, the lid requires a large switch to lock in place, instead of the twist-in-place method used in other Instant Pot models.
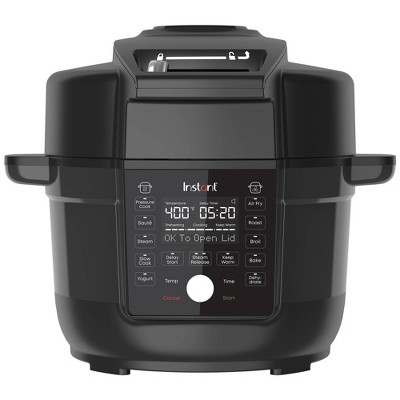
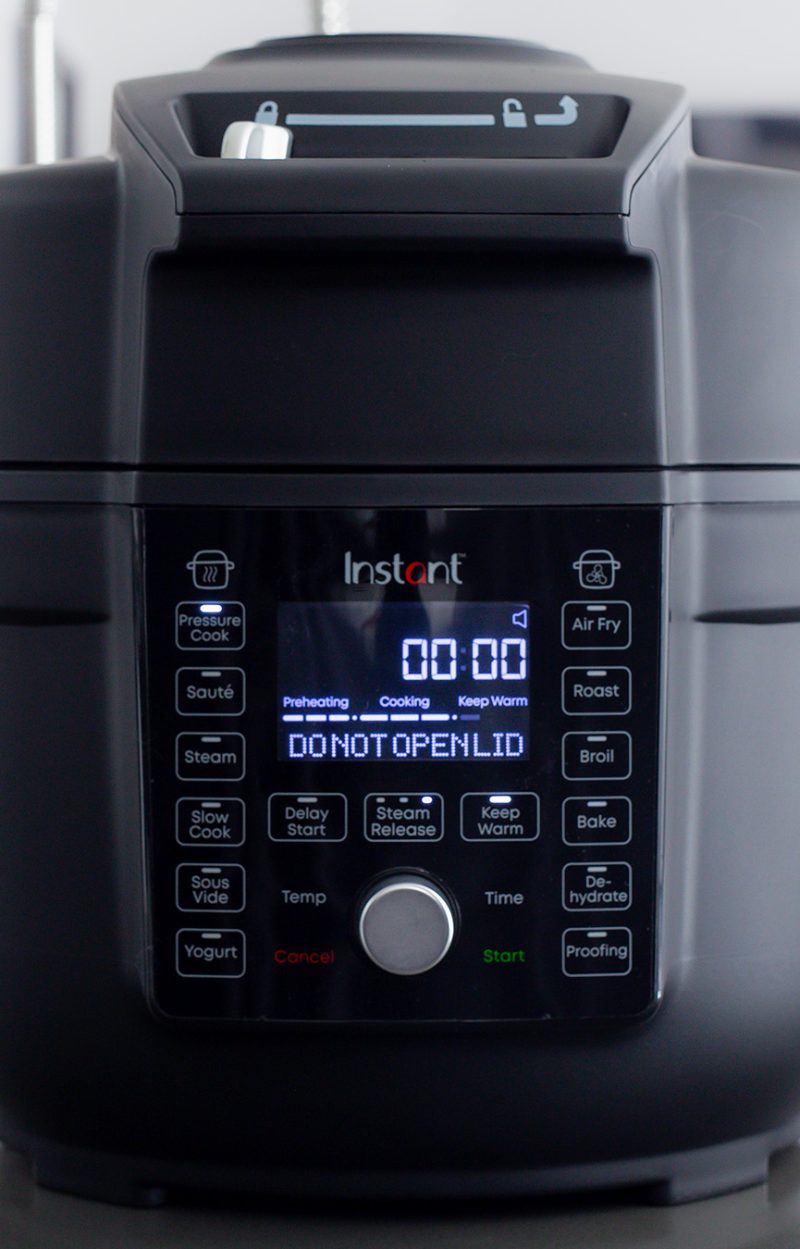
When the non-removable lid opens, it hinges toward the back at a near 90-degree angle. You can’t open the lid when it’s building pressure or at pressure and the message bar reads “Do not open.”
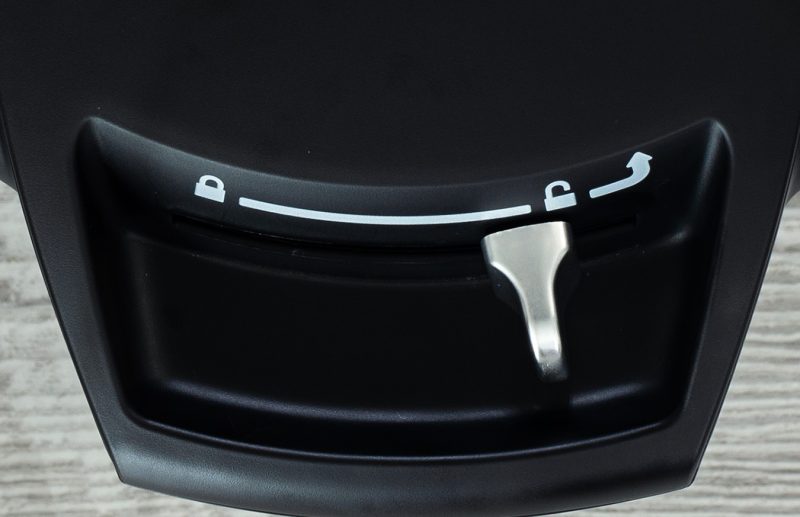
⚠️ Note: To open the lid, you need to slide the switch toward the unlock icon, then press and hold a little bit past the icon for it to actually open. The lid will not open unless you’re holding it in the unlocked position.
When open, the lid itself has a large, red button built in. This is the button you need to use to remove the Pressure Cooking Cover.
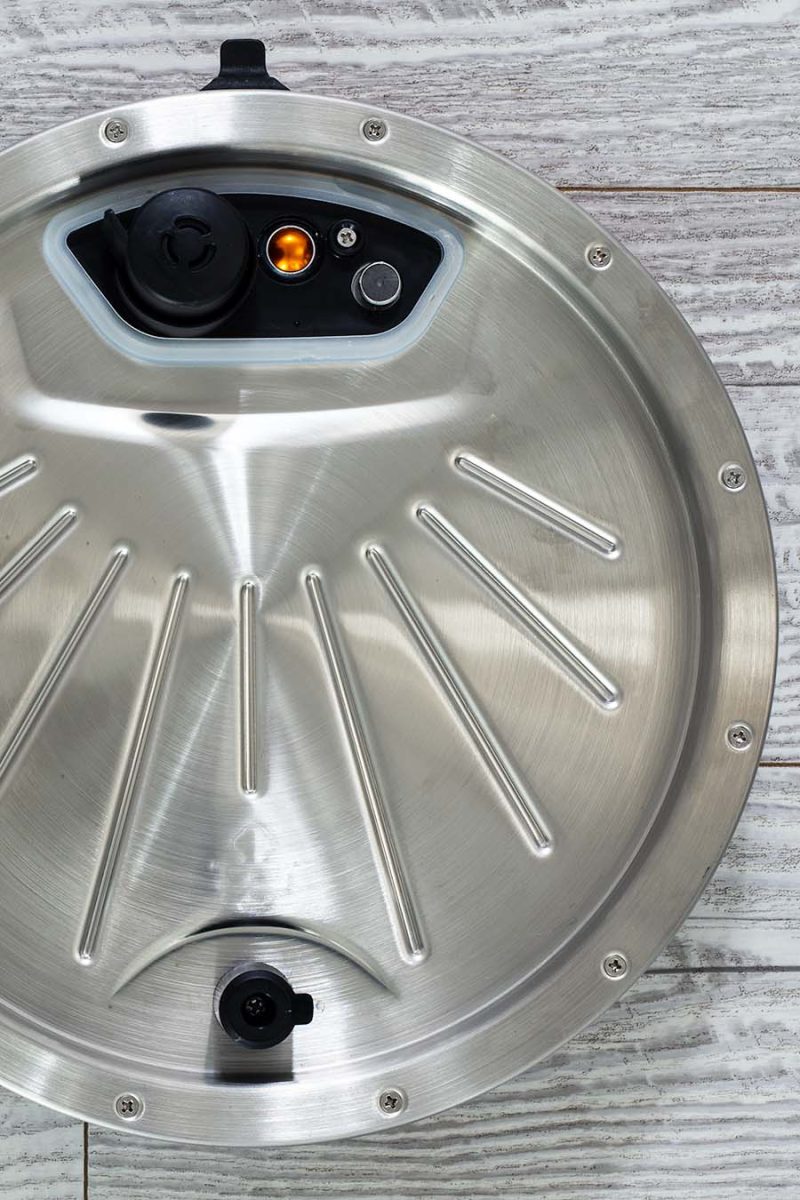
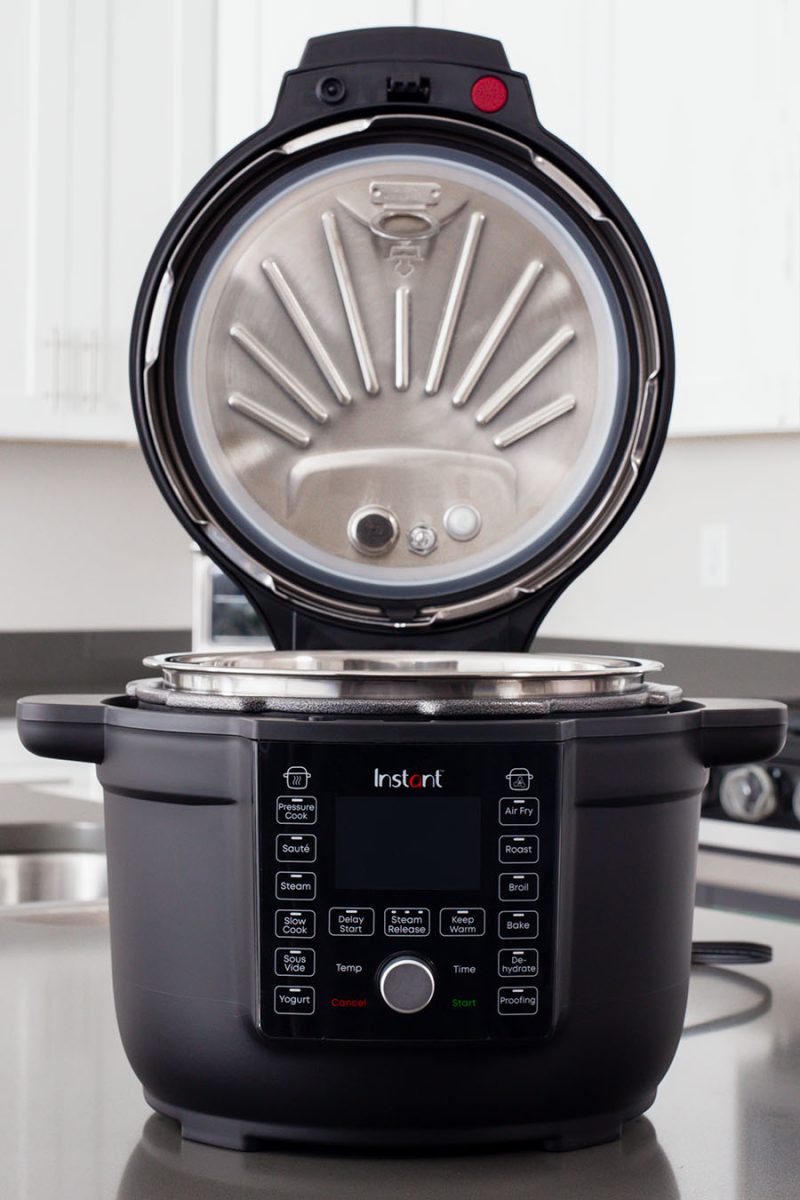
Pressure Cooking Cover
🔴 Push the red button to release the pressure cooking cover. Once the button is pushed, the cover will release and fall, so be sure to have your finger in the loop provided to prevent it from clattering against the cooking pot.
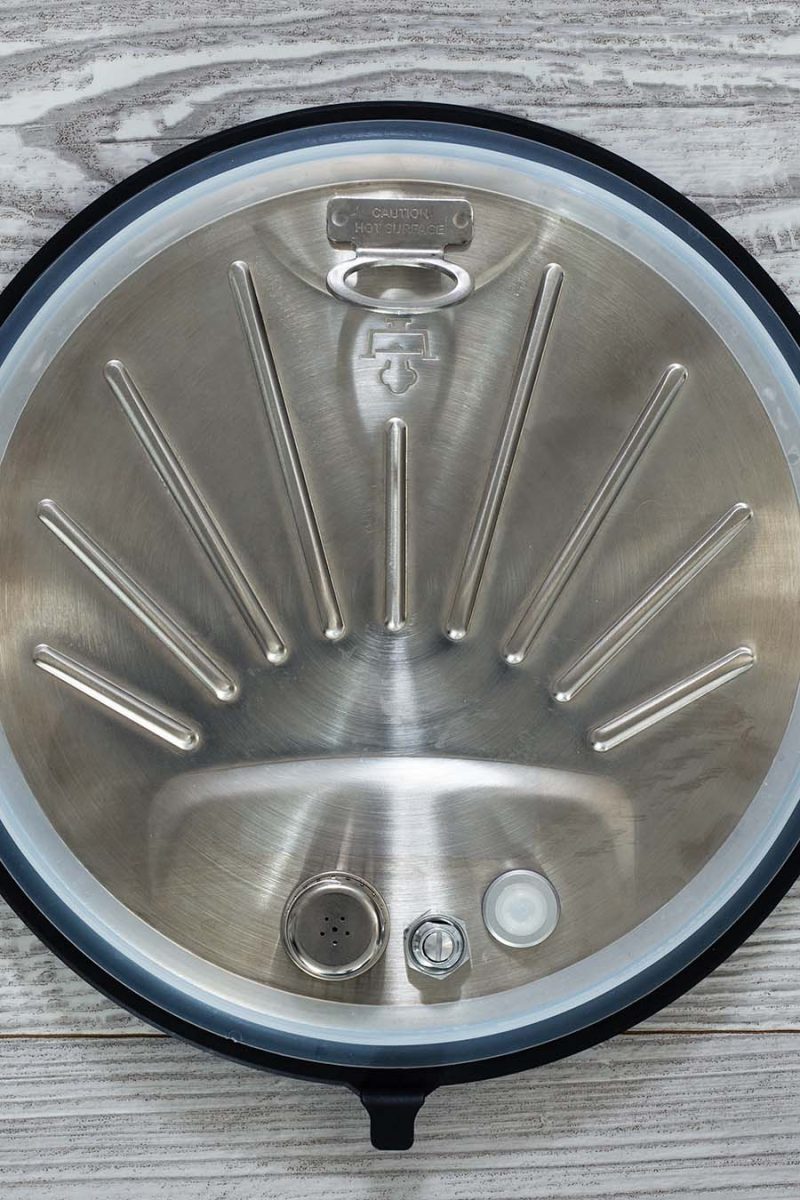
The pressure cooking cover has everything from a traditional pressure cooking lid, including the steam release valve, float valve, and silicone gasket. However, these features are entirely embedded in this single interior piece, which is completely covered when you close the main lid.
This is a huge change from being able to see them on the exterior. You cannot tell by sight when the float valve drops—you have to rely on the message on the screen. And you also have to use the Steam Release button on the control panel to release the pressure.
You can push the steam release button to switch release modes from quick release, pulse release, or natural release at any time; you don’t even need to press start, just change it and it flashes then selects in a few seconds.
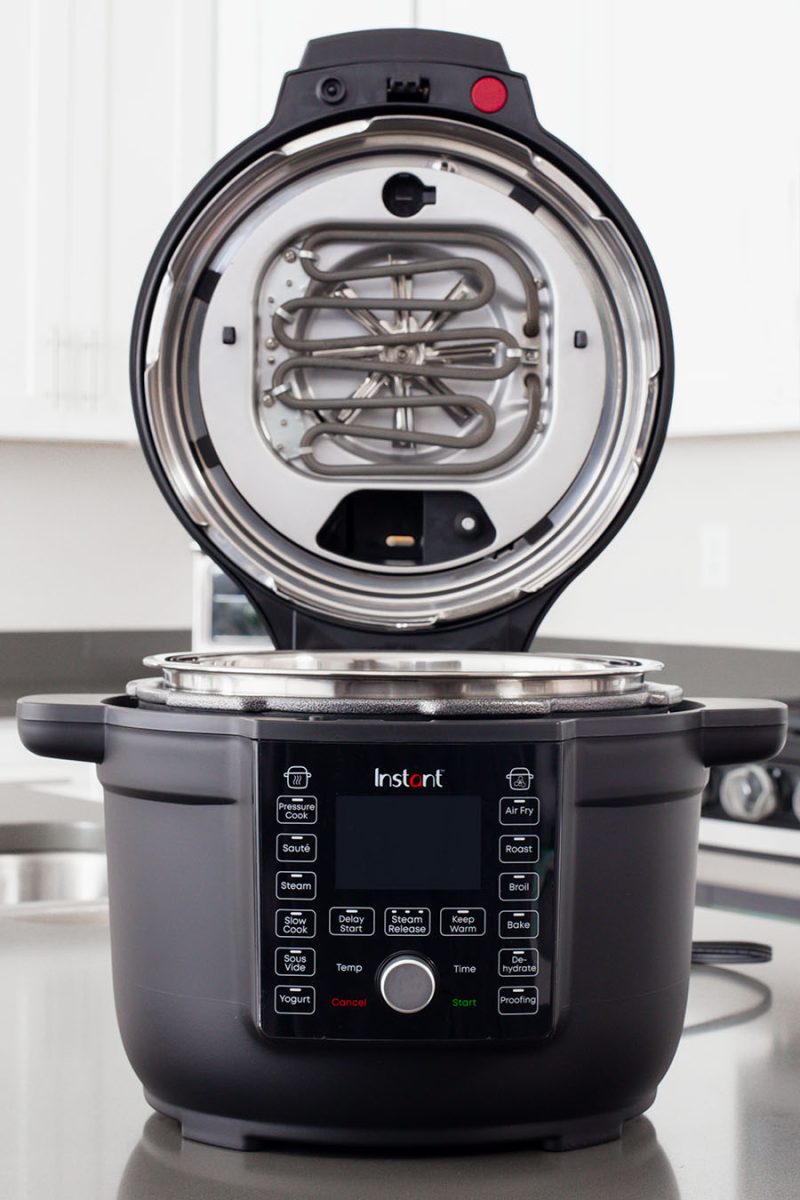
A major benefit to the inner pressure cooking cover is that the Ultimate Lid model completely blocks the air fryer heating element and fan while pressure cooking. In practice, this means you don’t have to worry about cleaning the fan and heating element every time you pressure cook.
🔐 The pressure cooking cover has a little black notch that fits easily into the lid housing. Simply line up the notch with the bottom of the housing so that the steam release valve can tuck up into the lid housing itself. Press gently until you hear the lid snap securely in place.
Silicone Sealing Rings
The silicone gasket is attached to the plate itself and does not come out. If you wanted more than one gasket you would have to buy a replacement Pressure Cooking Cover piece, which is not currently available for sale. Hopefully, they’ll address this in the future.
Because of this design, this model does not allow you to use separate sealing rings for different types of foods. (This can be a problem when cooking strong-smelling foods like onions or sauces and then trying to cook more delicate foods like cheesecakes.)
Return to the Table of Contents
Different Pot Dimensions
This 6.5 inch pot is wider and shorter than traditional Instant Pot cooking pots.
This shorter pot fits 8-inch pans easily, and if you have a very narrow push-pan with no lip, you may even be able to make a standard 9-inch cheesecake in this model. However, a traditional springform pan will not fit.
However, these pot dimensions make it impossible to use a 3-quart inner pot inside for pot-in-pot cooking, like you can with other Instant Pot models. It also makes it difficult to pot-in-pot cook with a tall trivet that has a side dish suspended above the main dish. (See our Chicken and Broccoli over Rice for an example.)
I believe this wider cooking pot was created to help it air fry items better. For instance, it would easily fit a small chicken to roast and brown.
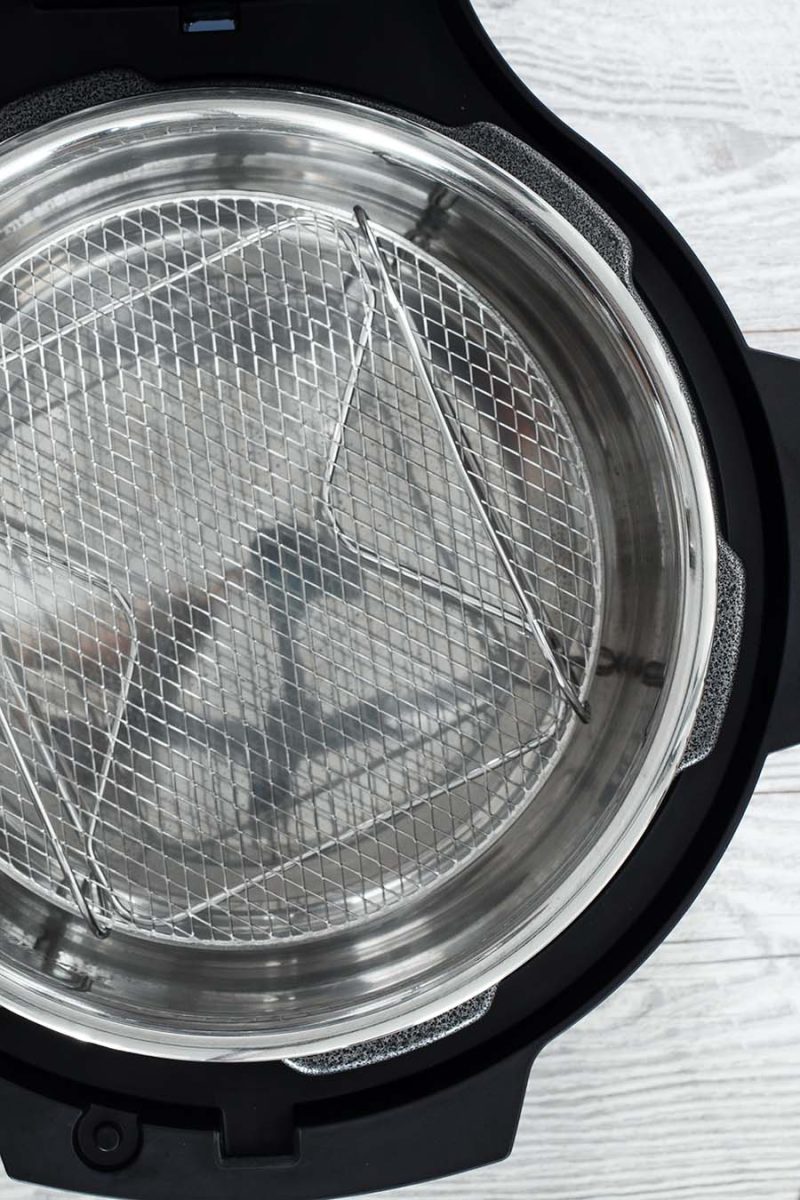
Air Fry / Cooking Rack
The included air fry / cooking rack is meant to be reversible. Use the tall side up for air frying, pressure cooking, and steaming. The shorter side up is meant for broiling and dehydrating.
In practice, the single-level air fry/cooking rack doesn’t hold as much as the crisper basket that comes with the two-lid Duo Crisp model. It also can be more difficult to clean if you’re cooking something drippy, simply because of all the small openings in the rack.
The trivet doesn’t fit a 7×3 cake pan, which is our workhorse for pot-in-pot cooking. However, it is wide enough to fit a 6-inch round pan.
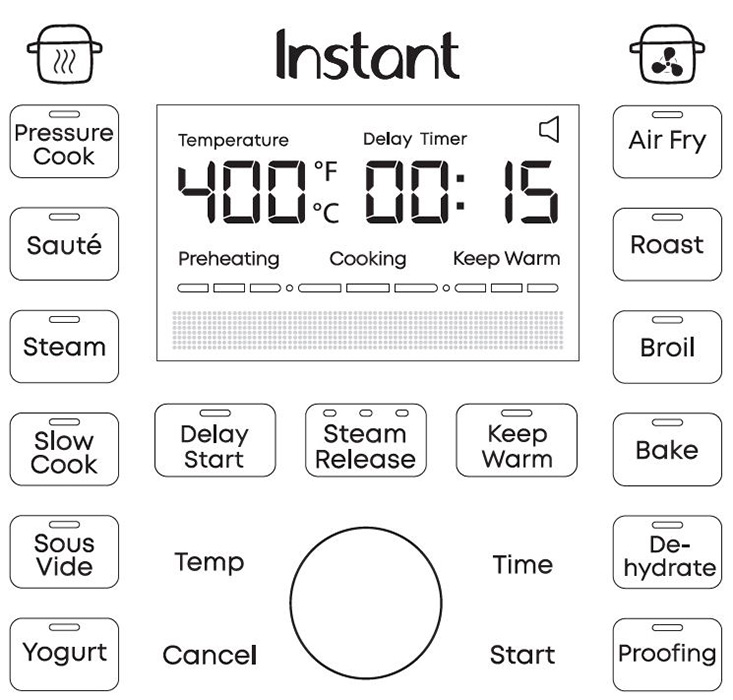
DISPLAY
The display is my favorite feature of this Duo Crisp model. First of all, the buttons are arranged in a really sensible way that groups all the functions that require the pressure cooking cover on the left and those that require it removed on the right.
Even better, beneath the traditional time and temperature LCD display, they have added a dot matrix display that talks to you with words. For example, it will tells you to remove the lid or lock the valve.
Note: Unlike other Instant Pot models, this Ultimate Lid model does not have the ability to push the function button more than once to remember your favorite cook times.
When it switches to the release, the matrix display will read “natural release” and then a counter counts UP from 0:00. (No L00:00 like older Instant Pot models).
(For how to use the buttons, continue reading in our How to Cook section, below.)
HOUSING
Unlike most other Instant Pot models, the Ultimate Lid model is made of a durable plastic instead of stainless steel. (Our guess is to to help cut down on the weight of the unit and to bring down the cost.)
However, it cleans easily. They have also slightly expanded the distance between the outer rim and the notches that surround the cooking pot, so it’s easier to clean. This space also clearly feeds in to an expanded condensation cup that actually collects the liquids from the lid.
Condensation on the inner lid flows down into the condensation cup when you open the lid, so you need to wash it every time.
Return to the Table of Contents

HOW TO COOK WITH THE DUO CRISP WITH ULTIMATE LID
How to Pressure Cook and Air Fry in the Instant Pot Duo Crisp with Ultimate Lid
Nearly all of our recipes here at Pressure Cooking Today cook at High Pressure. Here’s how to make our recipes in the Instant Pot Duo Crisp with Ultimate Lid.
Instructions
How to Pressure Cook
- Make sure that the pressure cooking cover is in place on the lid. Slide the switch to lock the lid. (If you don't do these steps first, the unit will beep to remind you.)
- Touch the Pressure Cook button, then touch the Time button and use the silver dial to set the cook time to the time specified in the recipe.
- Use the Steam Release button to select your desired pressure release. (The light order, from left to right, indicates Natural, Pulse, and Quick Releases). If the recipe instructions call for you to “allow the pressure to release manually for 5 minutes, then finish with a pressure release,” select the natural release setting.
- If you like, at this time you can also select a Delayed Start and toggle the Keep Warm setting on and off.
- Press the Start button, and watch the magic happen! (Note that after several seconds without pressing Start, your unit will revert to reading "Ready" and you'll need to repeat all of the steps.)
- After your cook time ends, your unit will switch into the release mode indicated previously. If you're not using a quick release, allow the unit to count up for the specified # of minutes, then touch the Steam Release button twice to switch to Quick Release (the light will be on the far right). After a brief wait, the unit will release any remaining pressure.
- After all of the pressure is released, the unit will display a message when the float valve has dropped and you can unlock the lid.
How to Sauté
- The Sauté function doesn't work if the lid is closed or if the pressure cooking cover isn't in place.
- Touch the Sauté button. The display will indicate one of six heat levels. For searing meat, I'd select a Level 5 or 6. For sautéing vegetables, I'd select a Level 3 or 4. If you wish to adjust the level, touch the Temp button and spin the silver dial to adjust the levels up or down. If you wish, you can also use the Time button and the dial to set the time you want the sauté feature on. (I rarely adjust the time and just press cancel when I'm done sautéing.)
- Press the Start button, and the unit will begin to heat the bottom of the pressure cooking pot. (Again, remember that if you forget to press Start, your unit will revert to "Ready" and you'll need to repeat all of the steps.)
- In most cases, when you sauté, wait until the pot heats to your desired temperature before adding the oil or other ingredients. (My exception is when sautéing with butter, I will generally let the pot preheat a bit and then add the butter so it's fully melted by the time the pot comes to temperature.)
How to Air Fry
- On the underside of the lid, press the large red button to remove the pressure cooking cover. (Make sure you have a finger in the ring on the cover so it doesn't clatter down when it releases.) Close the lid. It doesn't matter if you lock it or not.
- Touch the Air Fry button, then touch the Time button and use the silver dial to set the cook time to the time specified in the recipe. Press the Temp button and use the dial to set your air frying temperature. (This unit goes to a max of 400°F.)
- Press the Start button, and listen as the unit's heating element and fan kick on. (Again, remember that if you forget to press Start, your unit will revert to "Ready" and you'll need to repeat all of the steps.)
- As the unit cooks, it will remind you to turn your food if needed. If you open the lid it will pause your cook time and immediately resume upon closing.
Recommended Products
As an Amazon Associate and member of other affiliate programs, I earn from qualifying purchases.
⚠️ No matter what you’re making, remember to always use an instant-read thermometer to check for doneness, and add more time if necessary.
Return to the Table of Contents
THE DUO CRISP WITH ULTIMATE LID USER MANUAL
Like other Instant Pot models released in the last few years, the user manual for the Duo Crisp with Ultimate Lid is incredibly thorough.
The instructions for pressure cooking and air frying, as well as the other functions, walk you through the basic steps of the process.
See the following pages in the Instant Pot Duo Crisp with Ultimate Lid user manual for detailed instructions:
- Pressure Cook + Steam: page 20
- Sauté: page 23
- Slow Cook: page 25
- Sous Vide: page 27
- Yogurt: page 29
- Air Fry: page 31
- Bake + Roast: page 33
- Broil: page 35
- Dehydrate + Proofing: page 36
- Keep Warm: page 38
Return to the Table of Contents
WHAT ARE THE MEASUREMENTS FOR THE ULTIMATE LID DUO CRISP?
The 6.5-quart Duo Crisp with Ultimate Lid is 1500 watts, 18 pounds, and 15.5″ L × 15.5″ W × 13.4″ H.
When you’re measuring, since the lid is attached, make sure you have enough room overhead to ensure you can open the lid fully without running into any cupboards or light fixtures. On my counters, I needed to turn the unit sideways to cook in it.
The manual for the Duo Crisp with Ultimate Lid specifies that the minimum cooking liquids is 2 cups of liquid unless otherwise specified in the recipe. (However, in our testing so far, we have not had any issues making recipes with only 1 cup or less of liquids.)
Return to the Table of Contents
WHAT COMES WITH THE DUO CRISP WITH ULTIMATE LID?
The Ultimate Lid Duo Crisp comes with only one accessory: an Air Fry/Cooking Rack. This rack is meant to be reversible. Use the tall side up for air frying, pressure cooking, and steaming. The shorter side up is meant for broiling and dehydrating.
It does not come with a spare silicone ring, since the ring is non-removable. It also does not come with the air fry basket that is standard with the traditional Duo Crisp, which is too tall to use in this model.
In practice, however, the single-level air fry/cooking rack doesn’t hold as much as the crisper basket.
Return to the Table of Contents

WHY DID I GET A BURN NOTICE ON THE DUO CRISP WITH ULTIMATE LID?
Since the Instant Pot Duo Crisp with Ultimate Lid cooks at 1500W, it runs hotter than the more traditional 1000W Instant Pot models. Since most Instant Pot recipes are developed for these more common, traditional models, in rare occasions the higher heat will trigger the Burn Notice. (The other 98% of the time, the difference in power doesn’t make any difference with the recipes.)
When the Instant Pot Duo Crisp with Ultimate Lid reads FOOD BURN, the first things to check are:
- Does the inner pot have enough liquid?
- Are any food deposits stuck to the bottom of the inner pot?
If you’ve gotten the burn notice, remove the inner cooking pot from the base. Check for debris inside the pressure cooker housing or on the outside of the stainless steel cooking pot. (Keep in mind that the cooker will be hot, so you may need to let it cool to thoroughly check.)
Then check the cooking pot.
If just a little food has burned onto the bottom of the cooking pot, scoop the food into a separate bowl and scrape the burned parts away. Return the food to the cooking pot. At this point, you can add more liquid to the pressure cooking pot and try another pressure cooking cycle. Or you can transfer the pot to the stove or oven and stir while you finish cooking.
If a lot of food has burned on, you’ll be able to taste the burnt taste throughout and, unfortunately, you may have to discard the meal. Soak and scrub off the burned foods. Barkeepers friend is a useful cleaner to help remove stubborn stains.
In the future, be sure to add more liquid to the pot and avoid ingredients containing thickeners like canned soups or prepackaged spaghetti sauces.
⚠️ For more details, check out our in-depth discussion on the Instant Pot Burn Notice: What to Do and How to Avoid It in the Future.
Return to the Table of Contents
WARRANTY
The Instant Pot Duo Crisp with Ultimate Lid has a 1-year limited warranty. In the past, I’ve had great experiences with their customer service department, who responded quickly to help me get the solution I needed.
Customer Service is available at support@instanthome.com or 1-800-828-7280.
Don’t forget to register within 30 days of purchase to be eligible!
Return to the Table of Contents
Still have questions?
Leave us a comment and we’ll get you the info you need!
FOR MORE FROM PRESSURE COOKING TODAY
🥘 Browse our collection of the best pressure cooker / Instant Pot recipes.
💬 Follow Pressure Cooking Today on Facebook and Instagram for the latest updates.
👥 Join our Electric Pressure Cooker Facebook Group. Our positive community of pressure cooking fans use all brands of electric pressure cookers, so it’s a great resource if you have questions about your particular brand.
🥧 If you’re interested in more than just Instant Pot recipes, follow us at Barbara Bakes. There we post amazing breakfasts, breads, and the best dessert recipes!


So does this mean you can’t replace the sealing ring if it goes bad?
That’s correct – you’d have to replace the entire Pressure Cooking Cover.
My pot just keeps saying ready how do I use this instant pot. Lol
Hi Deb – we have a YouTube video showing how to use it https://youtu.be/5hM1zd87icI, as well as a great getting started guide. https://www.pressurecookingtoday.com/tag/beginners/ Have fun!
Thanks for another great review! I’m curious if it’s possible to do a controlled quick release where you release the pressure in spurts. If you do a QR & it starts spewing how quickly can you get the vent closed so you don’t end up with a big mess?
Thanks Josie! The pulse release setting is similar to a controlled quick release. It releases the pressure in spurts. It’s a bit slower than I do a controlled release, but you could finish with a quick release once you’re sure there’s no foam coming out of the steam release valve.
Thanks Barbara! I’m so used to having full control over the release (& speed of the release) with my older pots that I’m not sure how I’d adapt to some of the newer ones. Not being able to even see the float valve would be a real adjustment for me. Based on your review I know this isn’t a model that I’d be happy with….so again, Thank You for the review as it’s very helpful! 🙂
A very comprehensive review and excellent video. Many thanks for all your efforts. It’s a shame that there’s no Target stores anywhere in the UK… ‘cos otherwise I would be really tempted to get one to complement my 2 6l Duos. (I’m a fool for these awesome devices and have stopped using my air fryer ‘cos it’s so difficult to clean well.) 🙂
Thanks Rick! Stores seem to want their exclusive version lately. Costco has had its own version for a couple of years. I imagine the UK will get some version of this one soon. Hopefully, they’ll incorporate the dot matrix display on most models growing forward – it is so helpful.
Fantastic review ladies, wow! Loved the video as well for a visual sith how this thing works, thank you!
Thanks Jan – so glad it was helpful!