Ninja Foodi Smart XL Pressure Cooker with Thermometer Review & How-to Guide
The Ninja Foodi Smart XL Pressure Cooker Steam Fryer with SmartLid & Thermometer is a mouthful to say. But it is A GAME CHANGER for electric pressure cookers—the first one that can actually tell you what is going on in the pot.
The new Ninja Foodi Pressure Cooker with Smart Thermometer is here! We’ve been cooking in it for about a month now, and we have a LOT to say about it. (We really think the thermometer will be a must-have addition for pressure cookers going forward.)
Use the links below to jump right to the sections you want to read:
- What is the Ninja Foodi Smart XL Pressure Cooker with Thermometer?
- How to pressure cook with the Ninja Foodi Smart XL with Thermometer?
- How to use the cooking functions on the Ninja Foodi Smart XL with Thermometer?
- Pros and cons about the Ninja Foodi Smart XL Pressure Cooker with Thermometer?
- Warranty
- Parts and accessories
- What are the specs for the Ninja Foodi Smart XL Pressure Cooker with Thermometer?
- What comes with the Ninja Foodi Smart Thermometer Pressure Cooker?
- What do the error codes mean on the Ninja Foodi XL Pressure Cooker with SmartLid and Thermometer?
🛑 Bottom Line: The Ninja Foodi is the first pressure cooker to offer a thermometer that senses when your food is cooked to a specified internal temperature.
That alone makes it a good buy, and it also offers Steam Crisp and Air Fry modes to further expand its cooking capabilities.
If you don’t mind the weight and the attached lid, it’ll be a great addition to your kitchen.

WHAT IS THE NINJA FOODI SMART THERMOMETER?
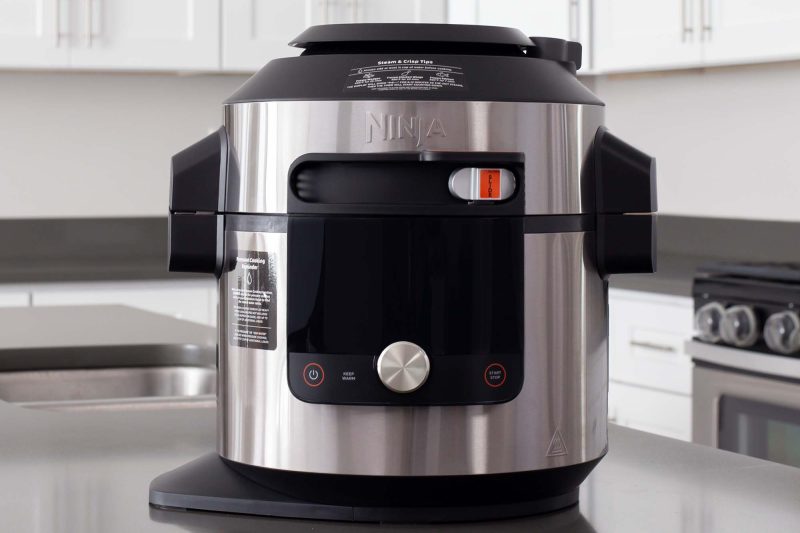
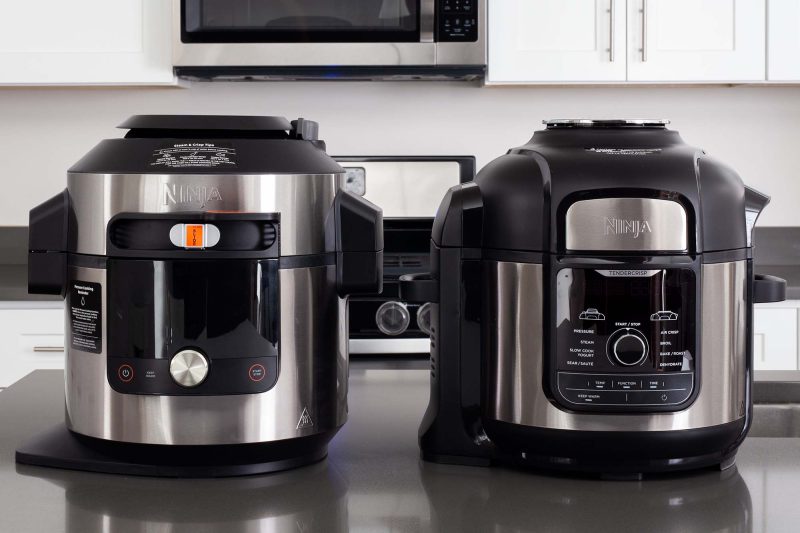
The Ninja Foodi Smart XL Pressure Cooker Steam Fryer with SmartLid & Thermometer is the latest model of electric pressure cooker made by Shark Ninja. It is currently only available in an 8-quart size.
(Also, its name is a mouthful. From here on out, I’ll just call it the Ninja Smart XL Pressure Cooker with Thermometer.)
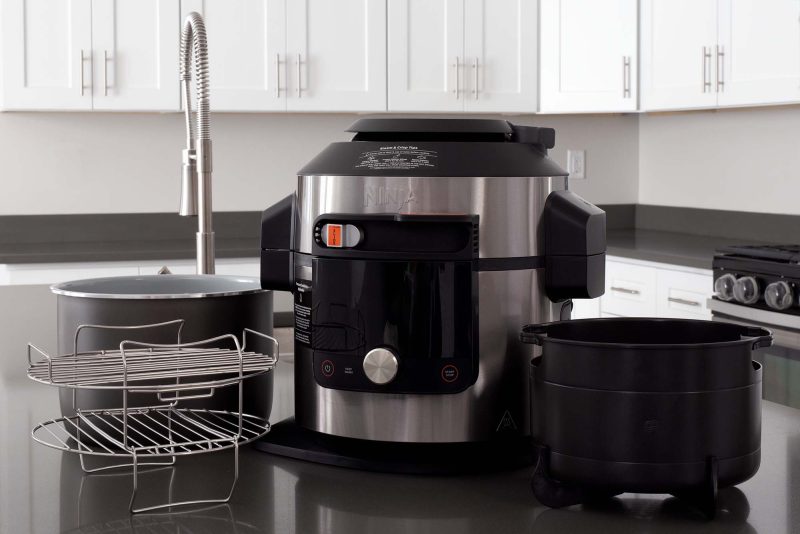
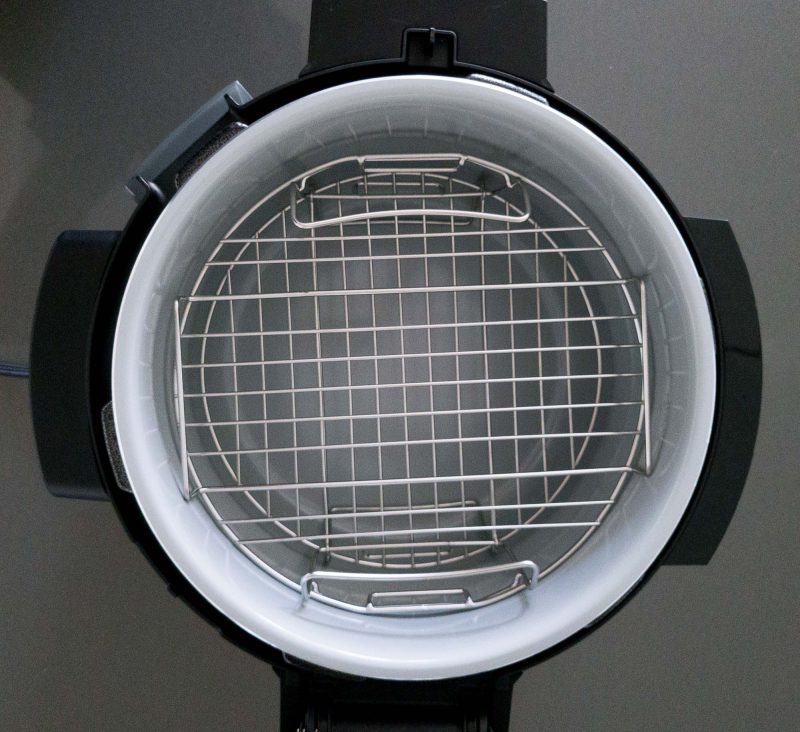
Included in the box are a ceramic cooking pot, a cook-and-crisp basket, and a reversible rack.
⚠️ Ninja has made SEVERAL versions of the Foodi with similar sounding names, so be sure to look for the one that offers the Smart Thermometer. (It’s model number OL701.)
You can’t add-on the thermometer afterwards if you buy the wrong model.
HOW TO PRESSURE COOK WITH THE Ninja Foodi Smart XL with Thermometer
The recipes on Pressure Cooking Today cook at High Pressure. Here’s how to make our recipes in the Foodi Smart Thermometer:
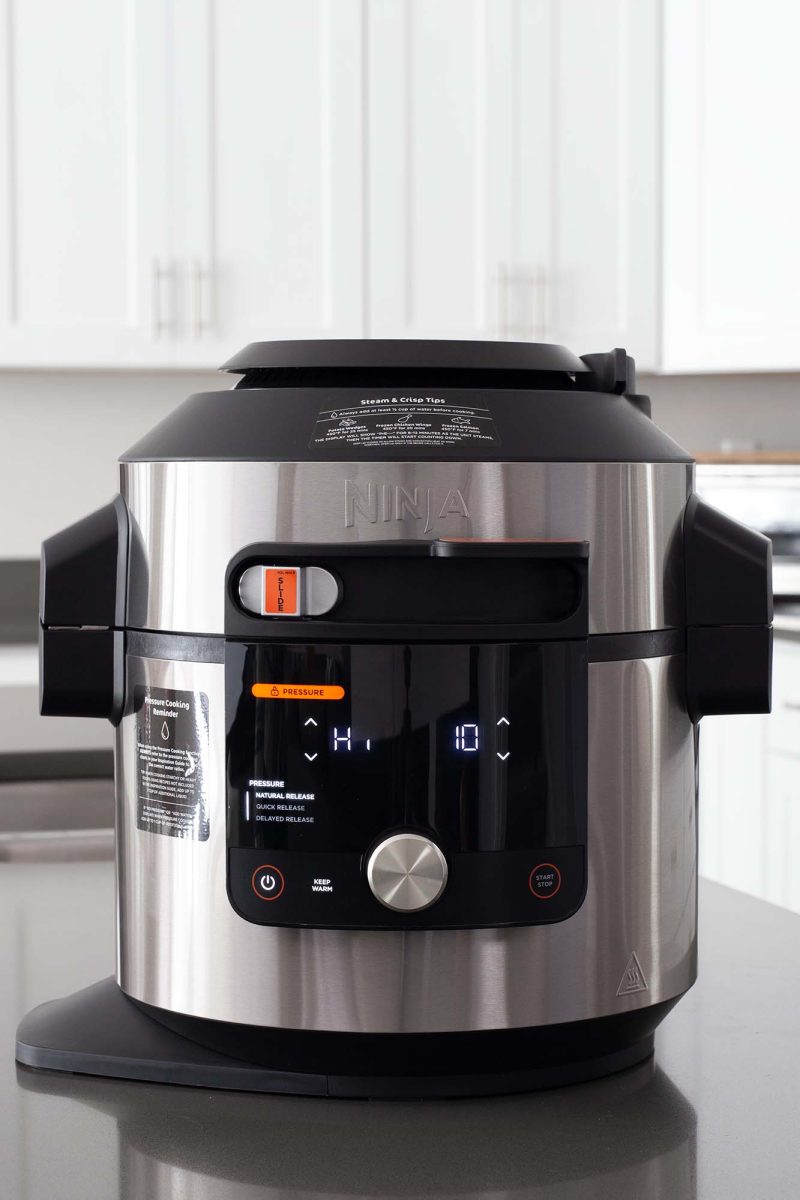
- Close the lid, then slide the smart slider to the Pressure setting on the left-hand side.
- Use the dial to select your desired pressure release. Use Delayed Release for recipes that read: “Allow the pressure to release naturally for ## minutes, then finish with a quick pressure release.”
- Use the little up and down arrows on the right to set the cook time.
- Press the Start/Stop button, and watch the magic happen!
- When the cook time ends, the recipe will direct you how to release the pressure (quick release, natural release or wait X minutes, then finish with a quick release). When it’s time to release the pressure, use the pressure release button. Wait until the float valve drops and the lid unlocks, then use the handle to carefully lift the lid.
▶️ We have a thorough YouTube review of what we love on the Ninja Foodi Smart XL Pressure Cooker with Thermometer. We also walk you through using it with the water test.
HOW TO USE THE COOKING FUNCTIONS ON THE Ninja Foodi Smart XL Pressure Cooker with Thermometer
The user manual for the Ninja Smart XL Pressure Cooker with Thermometer has been updated and is incredibly thorough this time around.
See the following pages in the Ninja Foodi Smart XL Pressure Cooker Steam Fryer with Thermometer user manual for detailed instructions:
- Smart Thermometer: pages 11-13
- Pressure Cooking: pages 14-16
- SteamCrisp: pages 16-17
- Air Fry: pages 17-23
Pros and Cons About the Ninja Foodi Smart XL Pressure Cooker with Thermometer
The Ninja Foodi Smart XL Pressure Cooker with Thermometer has addressed many of my concerns with older models of Ninja and has added new cooking settings that expand the machine’s capabilities. However, there’s still a few things you should know before you buy:
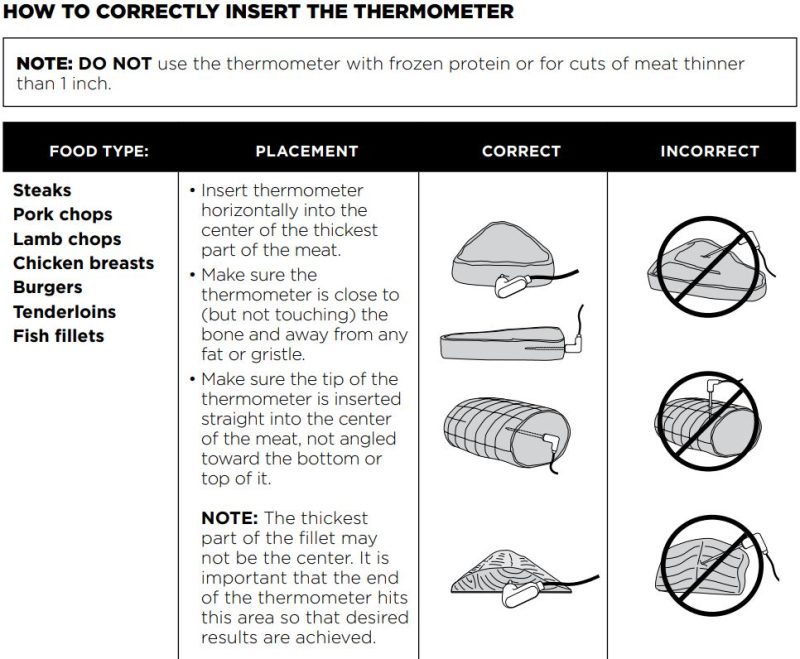
The Attached Thermometer
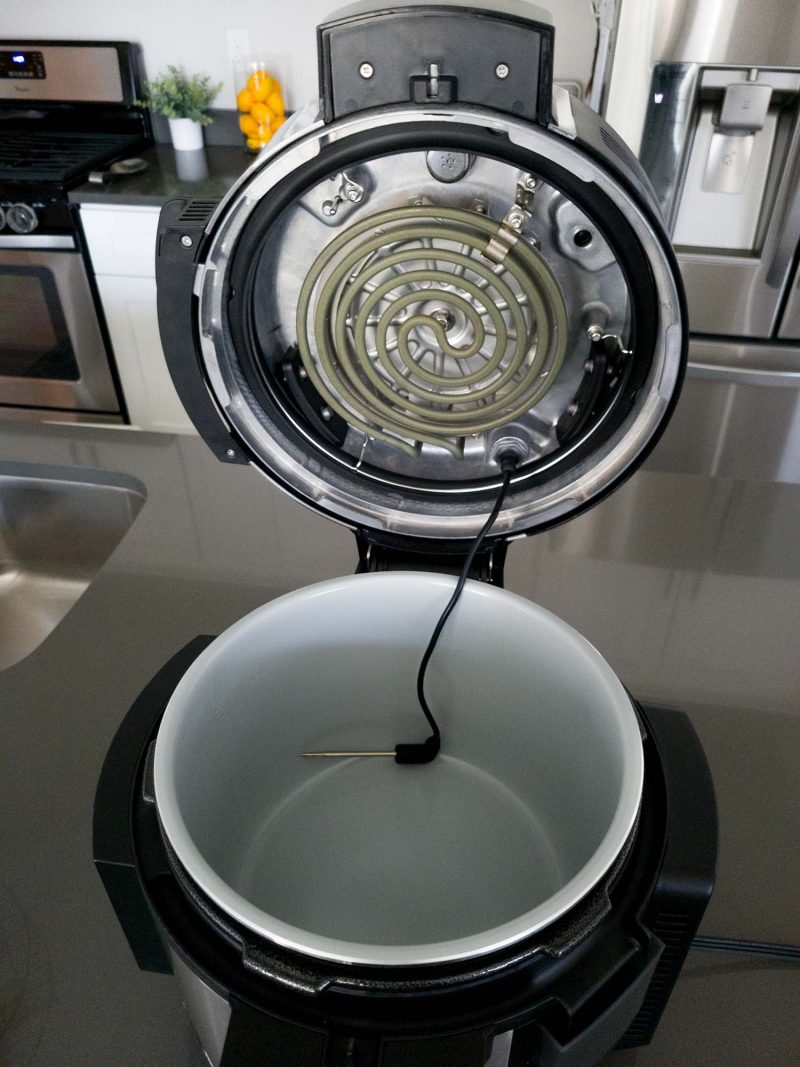
OK, let’s start with the game-changer: the inside-the-pot thermometer that works in all cooking modes, including pressure cooking.
The Smart Thermometer attaches right into the lid, and the cord is just long enough to reach into a pot roast. It’s covered in a sturdy rubbery material with a plug at one end and pointed tip at the other.
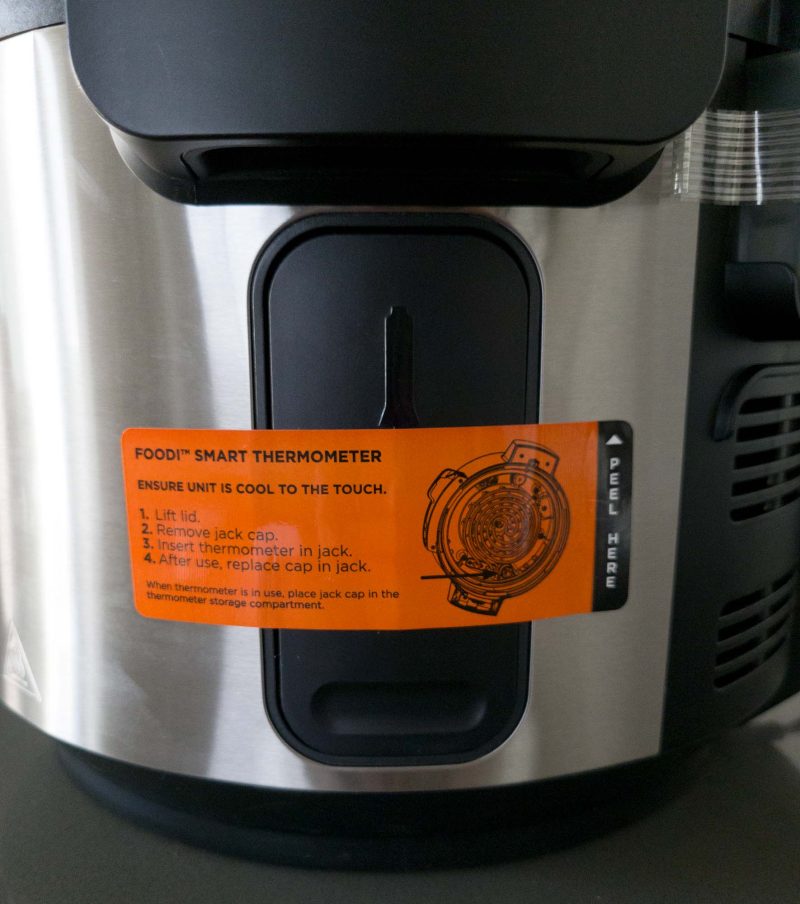
Note: The thermometer is stored in the pressure cooker housing—there’s a little black square with an indent for you to push. (When I unboxed it, the thermometer was the first thing I looked for, but I couldn’t find it anywhere in the packaging.)
It has a bright orange sticker, which is super obvious if you know to look for it. 🙂
🟢 Pros: If you’ve followed me through the years, the #1 thing I tell beginning cooks is that your pressure cooker doesn’t know what’s going on inside your pot and the different presets just run a cook time based on averages.
That’s simply not the case with the new Ninja Foodi Smart XL Thermometer pressure cooker. IT KNOWS WHAT YOU’RE COOKING AND WHEN IT IS COOKED THROUGH!!!
This is a feature I have been dying for for years, and I. AM. HERE. FOR. IT!
With the thermometer, you can tell your Foodi to pressure cook your roast until it’s cooked Medium, Well-Done, or Shreddable. And rather than running a set cook time, it just cooks until your food reaches the desired level of doneness.
Even better, the automatic programming accounts for carry-over cooking, so that when your pressure release is full the meat will be cooked to the degree you want it.
🟡 Pro and Con: The unit will not function if you lose the thermometer cap. Be SO careful not to lose it. However, the thermometer cap fits right into the same storage compartment as the thermometer to help you have a dedicated space for it.
Just ONE Smart Lid for All Settings
Rather than having an attached air fryer lid and a separate pressure cooking lid, the new Foodi Smart has just a single lid for all of the settings. The Smart Lid uses a slider to toggle between the locked Pressure Cook setting and the unlocked SteamCrisp and Air Fry settings.
🟢 Pros: I love having just one lid on this device. I think it’s an overall improvement over the older models of Ninja pressure cookers with two lids because it’s more storage friendly. The slider is intuitive and moves easily.
🟡 Pro and Con: Just something to know: the lid on the Foodi opens with a small lift tab above the slider display. If you open it from the side, you risk getting burned from the steam.
It’s a little different than most lids, and takes some getting used to.
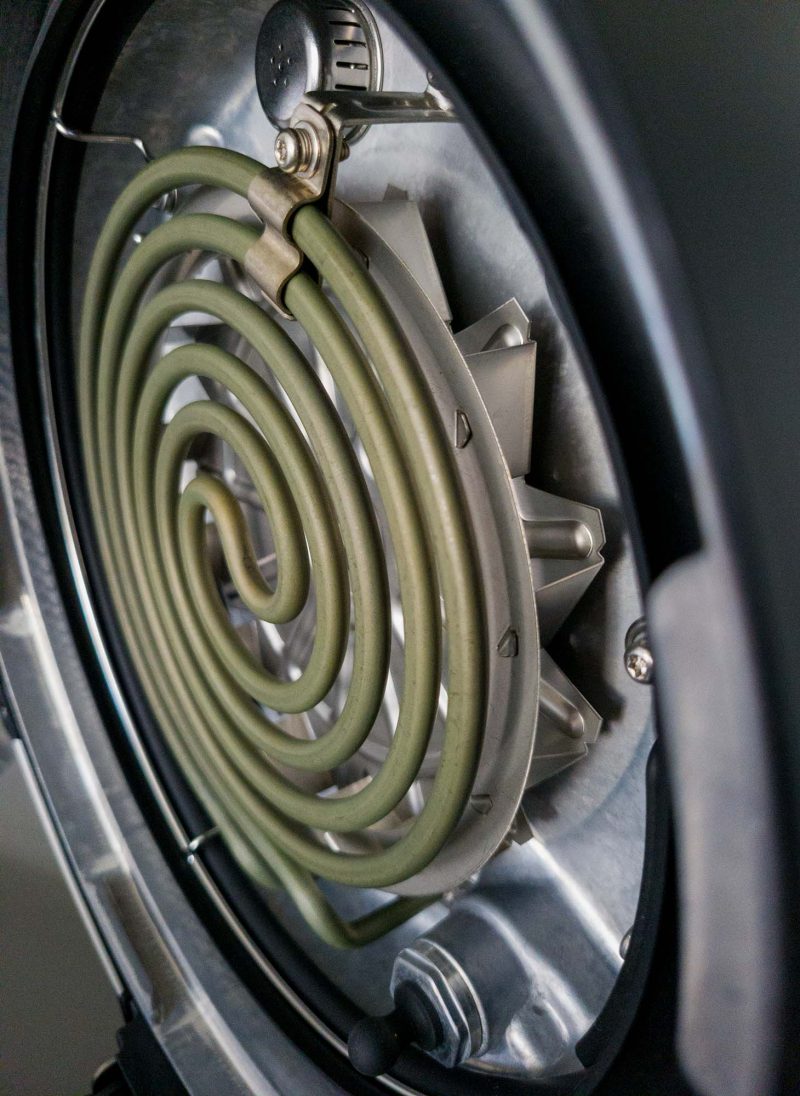
Also, one downside to having a single lid is that you have to clean the heating element every time you use it. (I still think it’s outweighed by not having to pressure cook with the air fryer lid standing straight up. But your milage may vary.)
🔴 Cons: As with all Ninja pressure cookers, the attached lid isn’t my favorite lid style.
Having the lid permanently attached adds to the weight you have to lift (almost 26 pounds!). (With the Instant Pot Duo Crisp and Pro Crisp models, you can remove the air fryer lid and lift the appliance in two trips.)
An attached lid is also harder to clean than one that can freely detach. The lid can only be cleaned in the upright position, and since you can’t remove the heating elements or fan, it’s hard to see all the places where residue may be.
Another issue with the attached lid is that water often gets all over the counter and in the condensation cup when you tip the lid back after pressure cooking.
💡 Ninja includes a great way to clean the lid in its manual. If you see residue on the heating element or lid, use the Steam function and set the cook time for 30 minutes. Once the unit cools, the residue should wipe away easily.

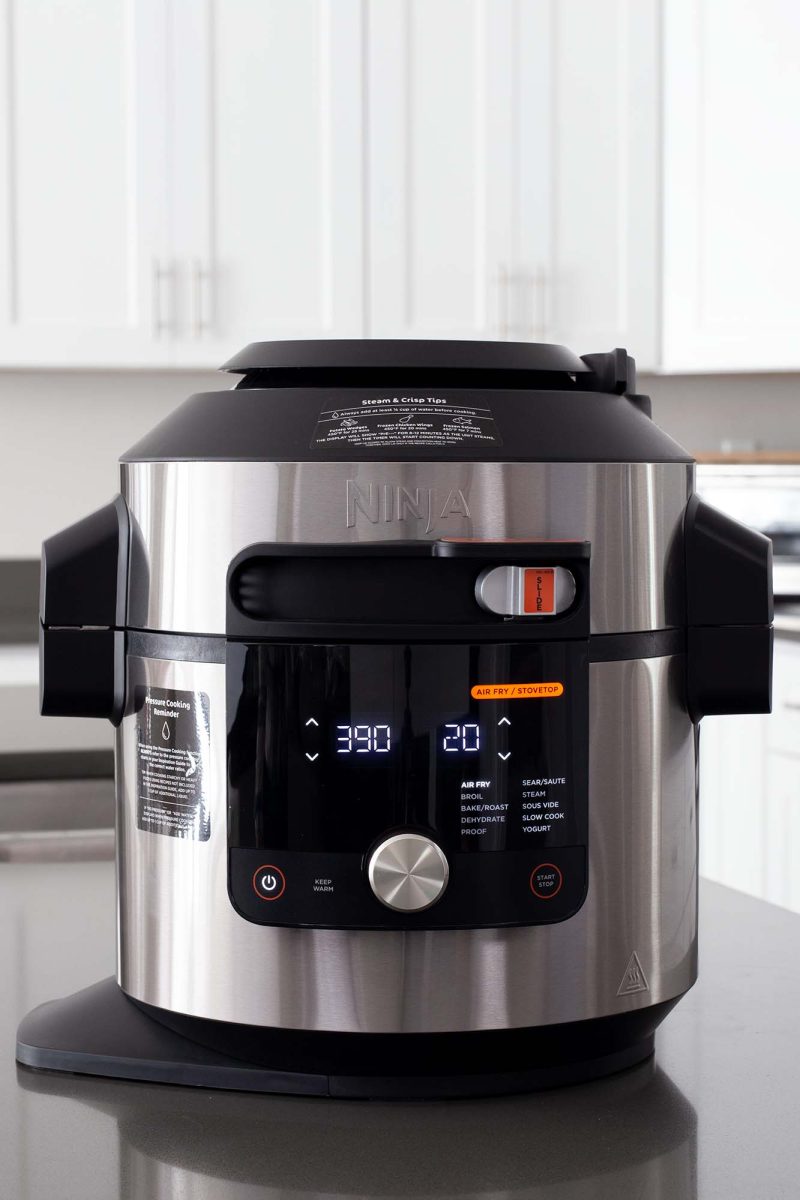
Pressure Cook Slider Position & Menu Steam Crisp Slider Position & Menu Air Fry / Stovetop Slider Position & Menu
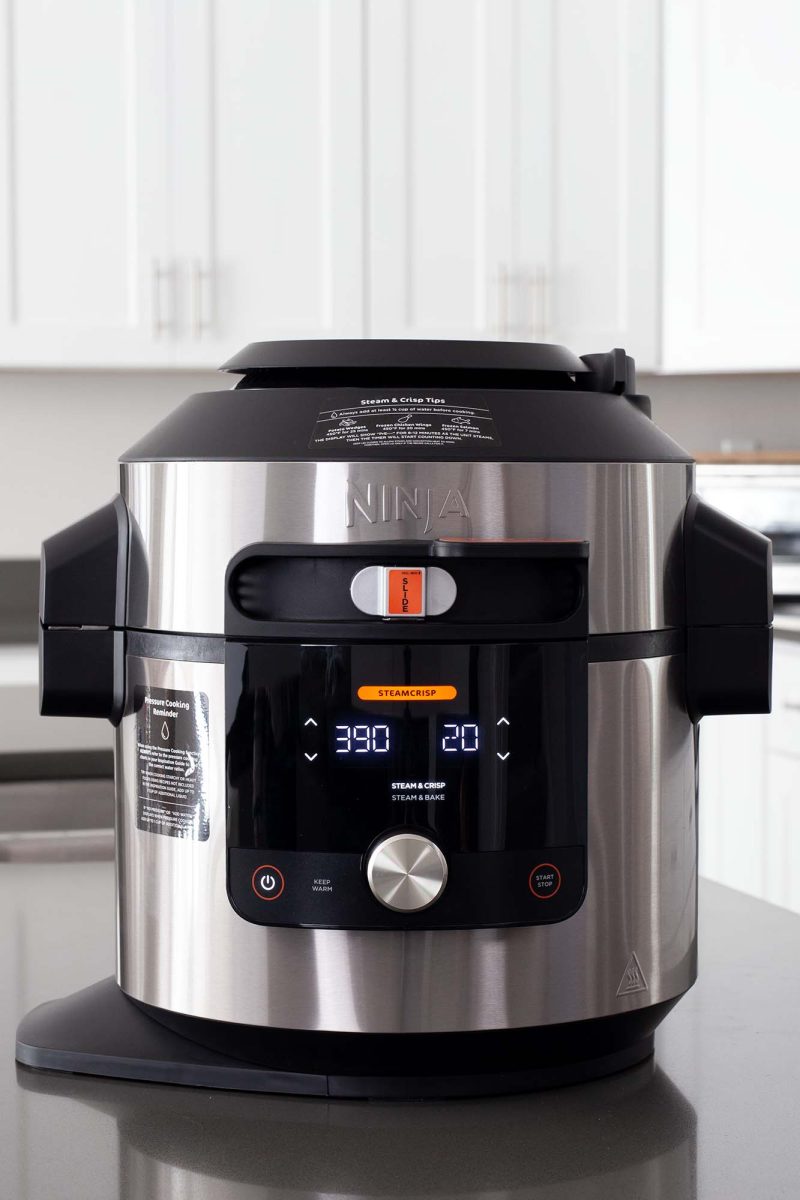
Large Display
The Ninja Foodi display is a large, digital display Ninja calls the Control Panel.
🟢 Pros: The options change as the position of the Smart Slider changes. So for example, only the options you use with pressure cooking are available when the slider is in the pressure cooking position.
Progress bar while coming to pressure. This display will show “PrE” and progress bars so you know how close until the Ninja is at pressure.
Note about the Display: If the cook time is less than 1 hour, the timer will count down by minutes and seconds. If the cook time is greater than 1 hour, the clock counts down by minutes only.
🔴 Cons: At first, it may not be clear what works as a touch screen and what works with the dial.
Automatic or Manual Pressure Releases
One of the things I have LOVED is that the Ninja Foodi Smart XL gives you the option to have fully automatic delayed releases. AND you can also release the pressure manually.
🟢 Pros: You can program in a set time for the pressure cooker to wait after the cook time ends before it releases the pressure.
🔴 Cons: Again, since it’s a touch screen button, sometimes it’s hard to press it.
Steam Crisp Cooking
This is Ninja’s solution to how air fryers can dry out some foods.
🟢 Pros: You get beautifully browned meats and breads when you use this method.
🟡 Pro and Con: This is a whole new way of cooking; it’s not air frying or pressure cooking. If you’re fine experimenting, the included recipe booklet has a large number of “kickstarter recipes” for the Steam Crisp function that you can use as a template to adapt your favorite recipes.
We made the whole chicken, the focaccia bread, and a cake and had great results with all of them.
🔴 Cons: It’s loud while steam crisp cooking. Like, running a hair dryer loud.
Also, in this mode, the steam is released constantly through the lid.
Simplified Cooking Functions
There are three main cooking positions on the Foodi Smart Thermometer pressure cooker, each with different sub menus:
- Pressure Cook
- Natural Release
- Quick Release
- Delayed Release
- Steam Crisp
- Steam & Crisp
- Steam & Bake
- Airfry / Stovetop
- Air Fry
- Broil
- Bake/Roast
- Dehydrate
- Proof
- Sear/Sauté
- Steam
- Sous Vide
- Slow Cook
- Yogurt
🟢 Pros: I love that the menu includes only cooking functions and isn’t cluttered with presets. And yet, I can’t think of a pressure cooker that offers more true cooking functions than this one does.
🔴 Cons: Honestly, I can’t think of any. This pressure cooker offers all of the major in-demand features like Sous Vide, Slow Cook and Yogurt, and adds to them with the Steam Crisp features.
WARRANTY
The Ninja Smart XL Pressure Cooker with Thermometer has a 1-year limited warranty.
You can reach Shark Ninja’s Customer Service at support@instanthome.com or 1-877-646-5288.
Don’t forget to register within 30 days of purchase to be eligible!
Parts and Accessories
The FAQs for the OL700 line of pressure cookers states that “All Ninja Accessories are compatible across the Foodi multicookers.”
However, it also instructs you to only use the SmartLid cooking pot and sealing ring that came with your pressure cooker.
Replacement parts and accessories are available at ninjaaccessories.com.
WHAT ARE THE SPECS FOR THE Ninja Foodi Smart with Thermometer?
The 8-quart Foodi Smart XL Pressure Cooker is 1760 watts, almost 26 pounds, and 15.39 inches long x 14.21 inches wide x 14.25 inches high (with the lid closed).
When the lid is fully open, it extends 23 inches above the countertop.
Make sure to have adequate overhead clearance to ensure the steam can release without any cupboards or light fixtures above it.
In Pressure Cooking mode, the manual specifies the minimum cooking liquid is 1 cup of clear liquids. However, in our testing, we have not had any issues making our recipes with less than 1 cup of liquids.
WHAT COMES WITH THE Ninja Foodi Smart Thermometer Pressure Cooker?
The Ninja Foodi comes with one clear silicone ring. Ideally we like to have more than one ring, one for savory and another for sweets.
It also comes with a cook and crisp basket, and a reversible rack (aka trivet). The rack has both high and low positions and can stack, which is useful for air frying.
WHAT DO THE Ninja Foodi SmartLid with Thermometer ERROR CODES MEAN?
The error codes on the Ninja Smart are more intuitive and not just letters and numbers.
WHY DID I GET AN ADD WATER ERROR ON THE Ninja Foodi?
This is the Ninja Foodi version of Instant Pot’s Burn Notice.
When the Foodi reads Add Water:
- Remove the inner cooking pot from the base.
- Check for debris inside the pressure cooker housing or on the outside of the cooking pot. (Keep in mind that the cooker will be hot, so you may need to let it cool to thoroughly check.)
- Then check the cooking pot.
- If just a little food has burned onto the bottom of the cooking pot, scoop the food into a separate bowl and scrape the burned parts away. Return the food to the cooking pot. At this point, you can add more liquid to the pressure cooking pot and try another pressure cooking cycle. Or you can transfer the pot to the stove or oven and stir while you finish cooking.
- If a lot of food has burned on, you’ll be able to taste the burnt taste throughout and, unfortunately, you may have to discard the meal. Soak and scrub off the burned foods.
In the future, be sure to add more liquid to the pot and avoid ingredients containing thickeners like canned soups or prepackaged spaghetti sauces.
A note about why: Most pressure cooker recipes are written for a 6-quart pressure cooker (Instant Pot is most common) that runs at 1000W.
The Ninja Foodi Thermometer cooks at 1760W, so it’s definitely more powerful than most other models of electric pressure cookers. (This comes in handy for the air fryer mode.)
The larger volume in the 8-quart size means that you’ll often need more liquids to cook foods. We usually double our recipes and our foods turn out well.
In most cases, the difference in power and size don’t make a difference with the recipes, but occasionally it will. You’ll get a feel for the differences as you continue to cook with it.
In most cases, the difference in power and size don’t make a difference with the recipes, but occasionally it will. You’ll get a feel for the differences as you continue to cook with it.
Other Ninja Foodi Error Codes
Pressure Fail means that the pot isn’t able to build enough pressure to cook properly.
When you see this, a few things to check:
- Is there enough liquid in the cooking pot?
- Is the sealing ring completely in place around the entire lid, with no loose parts?
- Is the pressure release valve in the Sealed position?
Plug In refers to the thermometer cap or thermometer—not the unit as a whole. Double check that whichever one you’re using is firmly inserted and free of debris.
Probe Error also refers to the thermometer and simply means that the cook time has run out before the thermometer detected the desired temperature.
Slide just means you need to slider on the lid to correspond with the cooking function.
Lock Lid means that the slider is not in the Pressure position.
Add Pot means the inner cooking pot is not inside the cooker base. The inner pot is required for all functions.
Shut Lid reminds you the lid is open and needs to be closed for the selected function to start.
Err is a catch-all error code. Sometimes this blips on, so you can always try the classic unplug it, wait, and plug it back in.
However, if this code continues to appear, unfortunately you’ll need to contact Customer Service at 1-877-646-5288.
FOR MORE FROM PRESSURE COOKING TODAY
🥘 Browse our collection of the best pressure cooker / Instant Pot recipes.
💬 Follow Pressure Cooking Today on Facebook and Instagram for the latest updates.
👥 Join our Electric Pressure Cooker Facebook Group. Our positive community of pressure cooking fans use all brands of electric pressure cookers, so it’s a great resource if you have questions about your particular brand.
🥧 If you’re interested in more than just Instant Pot recipes, follow us at Barbara Bakes. There we post amazing breakfasts, breads, and the best dessert recipes!